Let’s build an Express web server and deploy to an Azure virtual machine using infrastructure as code.
As part of this blog series, we will be walking through how to set up an Express application, create our cloud infrastructure using Terraform, and finally automating our code deployments with GitHub Actions. This is part 1 of 3 in which we will be building out our Express server. If you already feel comfortable with Node/Express, feel free to skip to part 2 where we will be provisioning our cloud infrastructure with Terraform!
What We Will Be Doing
- Creating a basic "Hello World" Express Server (this post)
- Write our infrastructure as code utilizing Terraform
- Creating a GitHub Action to automate deploying code changes to our virtual machine
Tools Required
What is Express?
Express is a minimal and flexible Node.js web application framework that provides a robust set of features for web and mobile applications.
Express allows us to build web applications and APIs utilizing Node.js with some helpful features like routing, middleware, and templating. Its big benefit is it reduces a lot of the effort required to get a web server up and running. Now let’s jump in!
Setting Up Our Express Application
In a brand new directory, enter npm init -y to accept the defaults. This will create a package.json for us.
Next, we want to install all the necessary packages, I’ll be using EJS as my view engine and PM2 for process management on our virtual machine. If you prefer a different view engine, feel free to pick what you like!
npm install express ejs pm2I’ll also be using nodemon for our local development, so we can install this as a dev dependency with the -D flag (or —save-dev):
npm install -D nodemonNow that our packages are installed, let’s put together all the components for our Express web server.
First, I’ll create a new folder called src to contain all our Express web server code. Within the src folder, let’s create a new file named index.js. This will contain all our main application logic.
Next, I’ll create a new directory within our src folder called public which will be used for any static assets we have (images, CSS, etc.). Inside the public directory, I’ll create a new subdirectory named css and within that, I’ll create my CSS file style.css.
Finally, I’ll create a new directory under src for all my EJS templates called views. Inside views, I’ll create a new file named index.ejs. This will have our HTML template.
After the previous steps, your file structure should look like the following:
📂src/
├── 📂public/
│   └── 📂css/
│       └── style.css
├── 📂views/
│   └── index.ejs
└── index.js
Now that we have our directory structure in place, let’s get our Express server going!
Writing the JavaScript Code
In our index.js file, let’s bring in the following two modules:
const express = require('express');
const path = require('path');
Now let’s initialize our Express application and define a port we want to run the server on:
const PORT = 5000;
const app = express();
Now we want to make our public directory a static folder. We can do this by using the app.use middleware and the express.static method.
app.use(express.static(path.join(__dirname, 'public')));Next, let’s tell Express where all our views are located and set the view engine. In this case I’m using EJS, so that’s what I’ll specify. If you have selected a different view engine, you can put that here.
app.set('views', path.join(__dirname, 'views'));
app.set('view engine', 'ejs');
Our next step is to create a new route to display our index page when the user hits the root our website. We can make a new GET route that renders our index page with the following snippet:
app.get('/', (req, res) => res.render('index'));Now when a user requests the root of our site, Express knows to render the template called index.ejs.
Last thing we have to do is tell Express to start our server! All we need to use is app.listen, which takes in a port number and a callback.
app.listen(PORT, () => console.log(`Server started on port ${PORT}`));That should be it for our Express server! Here is the complete code in index.js:
const express = require('express');
const path = require('path');

const PORT = 5000;
const app = express();

app.use(express.static(path.join(__dirname, 'public')));

app.set('views', path.join(__dirname, 'views'));
app.set('view engine', 'ejs');
app.set('views', path.join(__dirname, 'views'));
app.set('view engine', 'ejs');

app.get('/', (req, res) => res.render('index'));

app.listen(PORT, () => console.log(`Server started on port ${PORT}`));
Now let’s quickly create two start scripts so that we can actually run our sever! Inside the package.json file under scripts let’s add the following:
"start": "NODE_ENV=production pm2 start --name express_web_server src/index.js",
"dev": "nodemon src/index.js"
Okay, let’s quickly break down both scripts.
The start script will be used for our "production" virtual machine environment. This will tell Node to run in production, which will add some optimizations for us. Then, we tell our process manager, PM2, to start the file src/index.js with the name “express_web_server”.
The dev script uses nodemon to run our file src/index.js and it will also reload on any changes we make to the source code, which is super handy for local development!
Add the EJS Template HTML
Now let’s work on creating our view. Open up the index.ejs file and add the following code:
<!doctype html>
<html lang="en">
<head>
<meta charset="UTF-8" />
<meta http-equiv="X-UA-Compatible" content="IE=edge" />
<meta name="viewport" content="width=device-width, initial-scale=1.0" />
<title>Express Web Server</title>
<!-- Note that we don't need to include "public" in the CSS href -->
<link rel="stylesheet" type="text/css" href="css/style.css" />
</head>
<body>
<h1>Hello World!</h1>
</body>
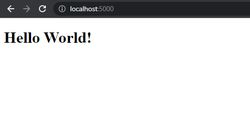
</html>Did you notice how we didn’t need to include public in the href for the CSS file? Now if we run npm run dev and go to http://localhost:5000, we should see the following:
Add the Styles
Let’s spice up our boring homepage with a better font. In the style.css file, we can add the following styles:
@import url('https://fonts.googleapis.com/css2?family=Roboto&display=swap');

body {
    font-family: 'Roboto', sans-serif;
}

h1 {
    text-align: center;
}
This will make the font a lot less ugly!

Wrap Up
In this post, we have went ahead and created a simple Express web server that we can use to deploy to our virtual machine in the future. Feel free to personalize this application to your liking! In the next post, we will be writing out our infrastructure as code using Terraform. I hope to see you in the next post!